

I will never forget the night my sister and I sat outside with a bottle of chardonnay just looking up at the stars in the night sky.
We were on holidays, driving our way from Ballarat (where my sister lived at the time) to Kangaroo Island then up north to Wilpena Pound. And it was near there where we were staying, in a small town called Hawker, where we were sitting outside of our accommodation.
The sky was big, and I mean big in every sense of the word. The night was clear and we could see so many stars; I reckon we sat there for a couple of hours just chatting and looking. You don’t realise what you can’t see, until you can see it.
Where I live, I can see a lot of stars, but the lights of the town are close enough to stop me from seeing everything, but I still love going outside on a clear night to see what is up there.
So when I got my latest little embroidery kit from Cozy Blue’s Stitch Club, the memories of that trip and that night came flooding back and I was a little bit excited to do this one up.
This is actually January’s kit, but as I live in Australia, and the kit is from America, I tend to get them a few weeks behind.
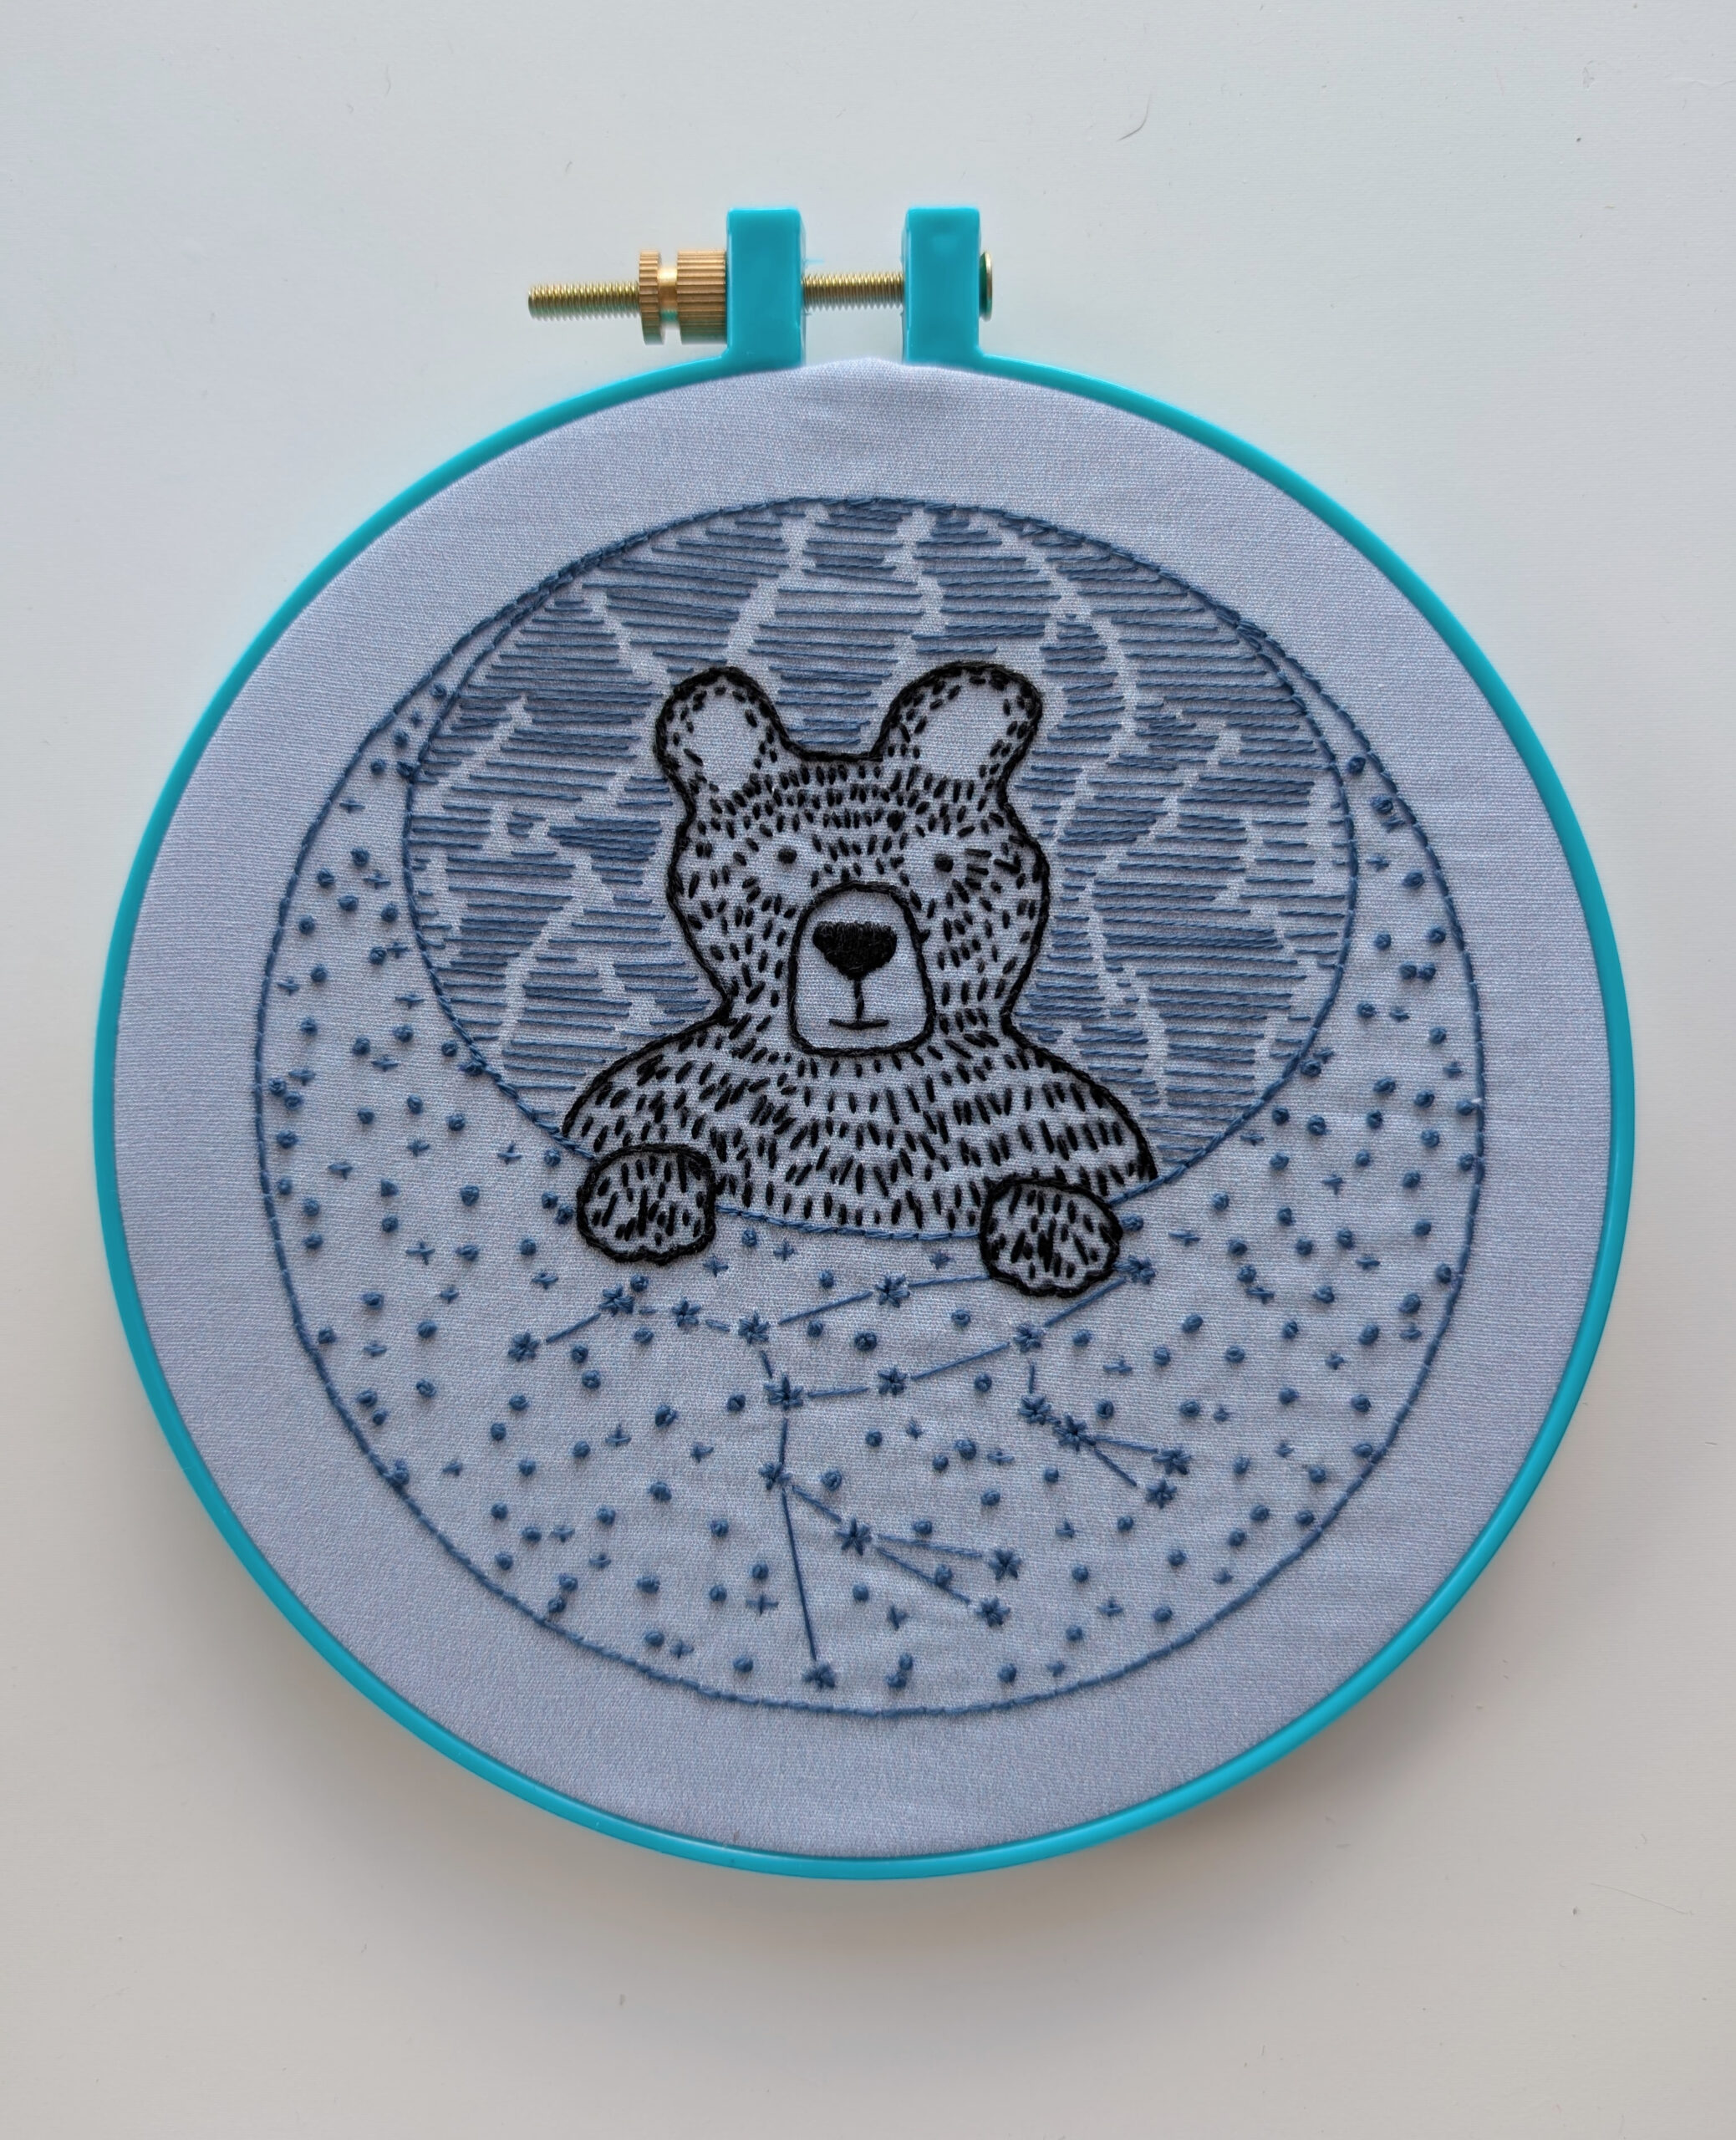
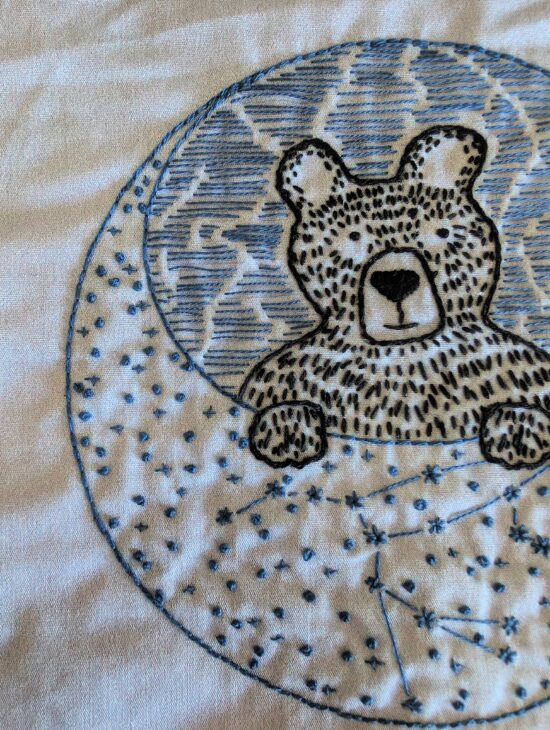
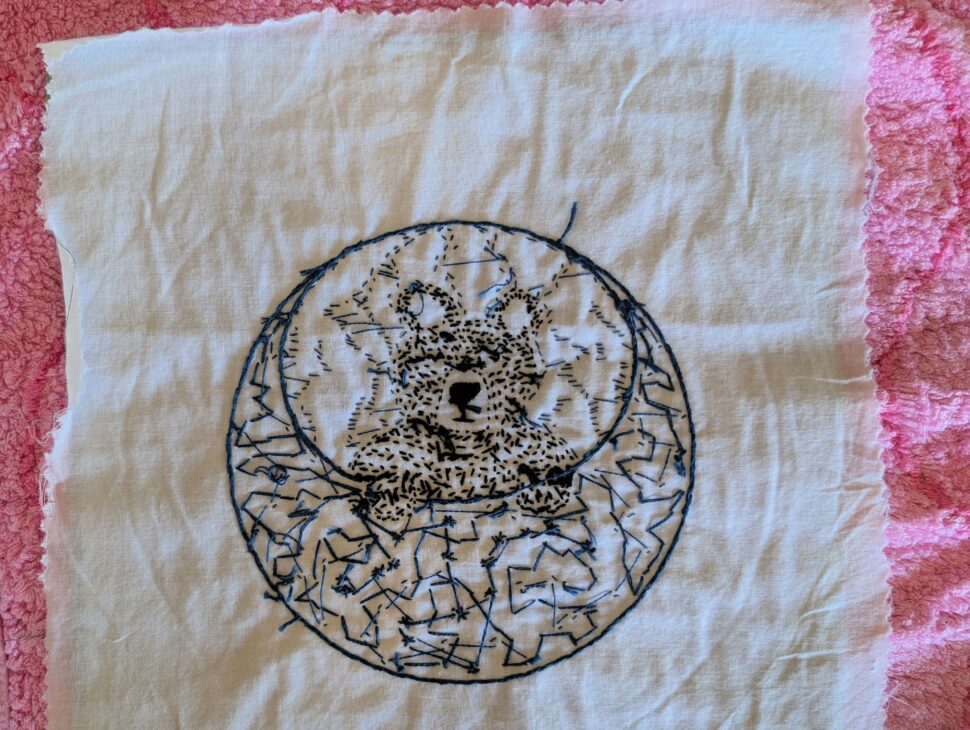
This was a quick little make with only two colours of thread – black and blue on blue fabric. I did work out that I should not being doing this at night as it was quite hard to see what I doing when working with the black.
The stitches used were not difficult and were ones I have done before. I did need a refresher on one as I always get confused with it (colonial knot) and whilst writing this post, I realised that I had done one of the stitches (star stitch) wrong, so I unpicked them and redid them – they look much better now.
Stitches:
Bear:
- Straight stitch (fur + background)
- Split stitch (outline)
- Satin stitch (nose)
- Back stitch (mouth)
- Colonial knot (eyes)
Constellation + Moon
Constellation:
- Star stitch (big stars)
- Colonial knot (dots)
- Cross stitch (little stars)
- Straight stitch (constellation)
Moon:
- Back stitch
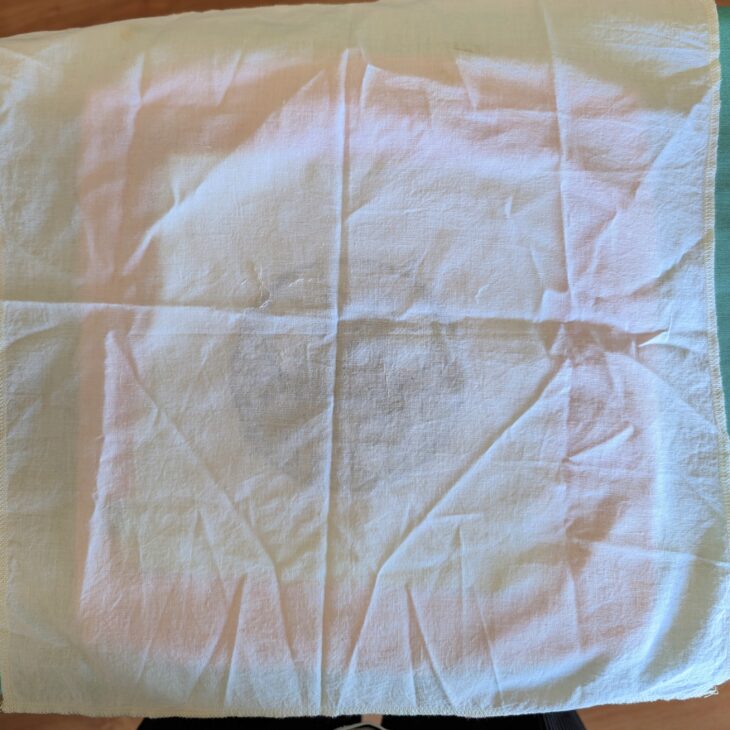
After I washed it, I noticed that there quite a few puckers and I have no idea as to what caused them. Not sure if it has something to do with the backing fabric, or a stitch done too tight? No idea. Oh Well.
The next challenge is to mount it as I have never done this before – but looking at a few videos, it doesn’t look hard. I need to get a proper frame for it; the one in the pictures is just one I had on hand.
These images are after the piece was washed. I washed it in some clothes brightener for a couple of hours, rinsed it, then put it outside in the shade to dry.
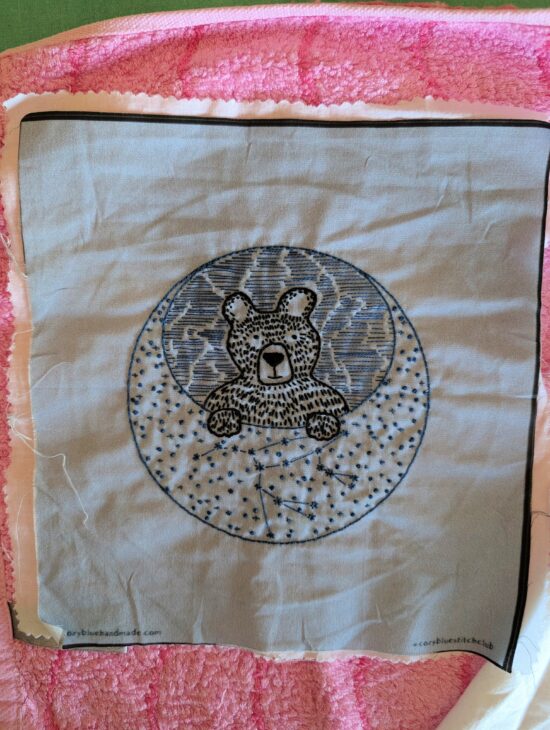
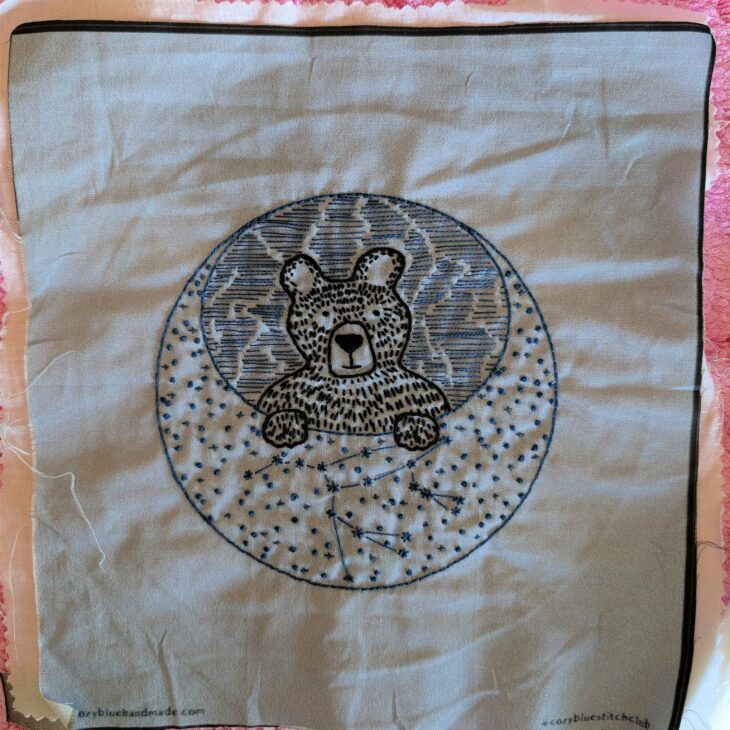

This was after they had dried and before being ironed. To make sure I didn’t squash the stitches, I ironed it on a soft towel.
And this is it, in its temporary frame.

Also need to get better at taking pictures – I have lost my touch! I will update this post once I have really finished him off.
But I think he is cute and not bad for my first go.
Stephanie xx